Sunday, May 4, 2014

How to Make Ice Cream

Making Ice cream is not that much hard, but is actually quite easy. Ever wander that you could make your own home-made ice-cream for real? Let's make that dream a reality then.


Here goes a simple guide on how to make a basic Ice cream.

  • Ingredients


      • Fresh Milk - 825 ml
      • Fresh Cream - 675 ml
      • Sugar - 375 g
      • Glucose - 75 g
      • Egg Yolk - 300 g
      • Vanilla Bean - 2nos.

  • Steps

    • Boil Milk, Sugar and Cream


      Bring the mix to a medium heat. Stir well to dissolve the sugar.

    • Split vanilla bean, squeeze the pod into the milk, add glucose


    • Off fire, stir well and pour the egg yolk


      Continue stirring. Don't let the egg curdle.

    • Finally strain the mixture, let it cool


    • Pour into a container and seal


    • Freeze it in the machine to the correct level of freezing point.
      Store it in the Deep freezer for about 2 hours.
      Remove from freezer about 15 minutes before serving.


    • Enjoy!


How to Be a Better Photographer

Photography is a language. A language that everybody feels. Few people know how to communicate with that language. They are the photographers. It is not knowledge but talent that is needed to learn this language.


Down goes a set of secret techniques about how to take your photos to the next level.

  • What Matters Most?


    It's untrue that you got to learn photography and all the theory to be a great photographer. Taking photographs of random events, makes you smile. It freshens your soul. After understanding the f-stop, I'm sure that you'll try to use that whenever you are taking a snapshot ever again. But there, you are bounding yourself into limits. Knowing stuff will sometimes narrow your abilities. Forget the theories for a while, and Enjoy Photography!

  • Talking with the Camera


    Every camera is different. And every camera has got its unique features. To get the maximum use of your camera, once you bought one, read it top to bottom. That way, you'll get to know about all the funky things it's capable of.  

  • Get Closer


    "If your photographs aren't good enough, you're not close enough"
    ~Robert Capa (The famous photojournalist)
    It's all up to your choice. If you feel like your images aren't tingling that much, take a foot closer to the subject and focus. The closer you are to the subject, the better the images get. Fill the photo and avoid wasting space.

  • Click! Wherever possible


    The best ever way to sharpen your skills is to Practice a lot. Maybe your selfies, some random object, a beautiful infant or any other thing. Just walk around and you'll find so many interesting things to have clicks. Always experiment. Build up your own style. For that, you need quite a lot of practice.

  • Know the Light


    Light plays the biggest role in photography. Before raising up your camera, look for the light resource. It may be the sunlight, city light or a lamp even. Whatever it is, take the highest vantage point of it. In prior to snap the photo determine how the light should play its role. How it should interact with the photo.
     
  • Bend towards your Subject 


    When taking photos beneath your eye level, get your knees dirty. Take the eye-to-eye advantage at its best.

  • Gaining new techniques


    Having the most expensive camera in the world does not tell that you're the best photographer, by any means. It's true that amazing photographers are born by using their very own smartphone. So, to increase the ability, you need to invest in books. Buy some fascinating photography books and learn new stuff through them

    The books I recommend:
      • Pro Secrets to Dramatic Digital Photos - by Jim Zuckerman
      • Fundamentals of Photo Composition - by Paul R. Comon
      • The Digital Photography Book - by Scott Kelby

  • Avoid Checking Photos while on Shoot


    Time is the most vital resource that a photographer has. Don't waste time looking at the back of the screen after getting a picture. That's a BAD habit. What's the hurry? You can see them later. Chances are that you will miss a great snapping opportunity while watching the clicked photos.
     
  •  Join a Photographic Community


    In a community, there's power and magic. If you join a community, you'll be able to publish your photos for the rest of the world to see. And not only that, you'll get feedback from the professionals around you. You'll get a chance to improve your skills furthermore.  

  • Break the Rules


    "If you Obey all the rules, You Miss all the fun"
    Some rules are to be broken! So go ahead, and break some! Experiment and Adventure. Always get experience in everything. Make mistakes and learn from them.

    Go forth and Shoot!


How to Record MIDI

MIDI stands for Musical Instrument Digital Interface. Musicians use this as a communication protocol for electronic instruments.


Most digital keyboard instruments are MIDI supportable. Audio recording and MIDI recording differs, as MIDI only messages and notify the PC about which keys has been pressed in your keyboard. But it doesn't send actual sounds. Then only the music-making software interprets this data into actual sounds. (Visit How to Use Apps for Music for further guidance) 

  • Why MIDI Recording?


    • MIDI Files are editable
      You can edit your entire MIDI file by using MIDI recording. But, the professionals use this to tweak small errors in their play.

    • MIDI Files are smaller in size
      Unlike the MP3 format you are used to, MIDI files are thousand times smaller. It is not about saving PC space. MIDI files are easier to transfer and backup. It comes up with so many mini-midi-advantages.

    • Quality is Saved
      I'm sure that you've had so many hardships on recording audio. No matter how good you record, it ends up being useless, because the volume and the quality get decreased meanwhile. But MIDI is directly connected to your PC. So that neither the quality nor the volume get damaged.

  • 3 ways to MIDI Recording


    • Sequencer
      Most of the keyboards have a record function. If your instrument is memory-stick-supportable, you can simply record your performance on the instrument itself. After that you can connect the memory stick to your PC to get the recording and develop it further.
       
    • Special Sequencer
      You can connect a separate device called special sequencer if you are not having the sequencer by default. Switch the other end of the MIDI cable for your PC. Many musicians are used to this because it assists for real-time notes playback editing.
       
    • Connecting to the ComputerPossibly, all the digital pianos and keyboards have their MIDI ports sunk into them. You'll find MIDI IN, MIDI OUT or even MIDI THRU ports which are located at the back side of your instrument.

      In order to connect your instrument to the PC, you'll either need,
      • A direct cable line
      • MIDI-to-USB interface 
      • Game port interface

  • A direct cable line


    Modern keyboard can be directly connected to a computer via a USB data cable. Because, they have the USB port themselves. The USB port in the instrument is called 'to-host' connection.

    When buying a data cable, pay attention to the type of cable. Because USB cables come in two types
    1. A/A (same connectors at each point)
    2. A/B ( fat and thin connectors)

  • MIDI-to-USB Interface

    Luckily or unluckily if you are having only this interface:


    You don't have to bother at all. All you need is a MIDI-to-USB interface. It is also a data cable, which consists of two or more MIDI connectors on one point and a USB connector on the other.


    P.S. :
    Procedure to connect>
    • Put the MIDI IN cable to MIDI OUT socket
    • Put the MIDI OUT cable to MIDI IN socket
      (If you connect IN-IN and OUT-OUT, nothing will happen)

  • Game Port Interface (Joystick)


    This is found on old computers. So, if you are the one who's still having that old personal computer, MIDI recording is possible for you too. You do have to have a special cable with a game port connector on one point and a MIDI connector on the other.


    Once you've got your cables connected, Approach to experience MIDI Recording!

How to Use Apps for Music


Music software is what keeps the Music production running. Music software industry has done major impacts on music education system as well. It has given new hope to present day musicians and beginners. With the help of apps the making of music is no more a tragedy. Various varieties of music apps have planted new ideas to compose and perform music in ways that never been seen before.


Let's check out the Prime fascinating Music Apps available in the cyber market.

  • Sibelius First


    This is a version of the so-called top notch music notation software, Sibelius 7. This software offers all the features you need to make professional-quality music. It has the most easy-to-use features that you can never imagine of. (Eg:- The copy & paste functions, editing features .etc)

  • Finale Printmusic


    If you are searching for a high-quality, elegant notation product for your next album, trust me, Finale will do miracles for you.
    • Real time MIDI keyboard input
    • Creating guitar chord diagram
    • Manual step time entry
    You can even transcribe your indtrumental music via a microphone with the help of the application, MicNotator.

     
  •  MagicScore Maestro


    If you prefer more advanced facilities for editing your music data, as the name says, MagicScore will high score your music make with its magic.
    It offers several features that make you experience the magic in music.
    • Virtual Piano
    • Virtual six/seven-string guitars
    • Real-time notes play-back editor 

  • Forte Notation


    This software comes in 3 versions:
      • Forte Premium - Advanced Composers
      • Forte Home - Experienced Users
      • Forte Basic - Intermediate and Beginners

    The interface makes it pleasant to work with. You will be able to convert the formats of music files as you prefer. It even offers tutorial guides for you to add experience for your music career. The Music Palette feature makes it very easy to edit notes, lyrics, dynamics, chords and all the stuff you need.

  • QuickScore Elite


    This can be taken as a full-recording-studio package. Not only that, it also lets you make professional quality sheet music. QuickScore might be your one-stop-studio because its easy-to-use interface contains all of the tools you need to blow brilliance into your master piece.

    The available tutorials do a great job to beginners and believe it or not, in no time you will be making music too.
    Few features makes QuickScore Elite unique
      • Score editor
      • Split track
      • Mixer
      • Audio Editor and so on.

    But, one disadvantage of this software is that it doesn't notate input at real-time. The program will wait until the recording is complete and then only will display the notations.

  • Music Time Deluxe


    If you are a beginner or a hobbyist this software will make great sense to you. You will surely be delighted with the easy-to-use interface. You can write, or arrange music for bands, piano, vocals, choirs and so on. You'd be impressed by the editing, performance and printing features that are made available for you. Discover yourself and enjoy music!

  • Notation Composer


    This software has all the standards of notation tools, general and extended features that can really assist you with the music-making process. Importing songs, editing and customizing them are made easy for you to make you interested.

    Getting into the right track will be bit difficult when talking about Notation Composer. You'll have to try tutorials and user guides and no doubt that you'll be amazed by how easy it is to create a brilliant piece of music.

How to Bandage Your Dog


No one possible can fully plan for an emergency. But it always helps to be equipped with at least the basics. There are plenty of diseases in the dog-society trying to swallow your doggy.


Abdominal injuries, broken bones, broken back are some of them which can be mended by bandaging. So, it is better to know the art of bandaging your dog.

Down goes a quick bandage treatment walk through that is good for knowing.


  • Bandaging a Chest wound


    • Clean the wound thoroughly 
    • Apply gauze
    • Press the gauze hard and roll a bandage all over the chest 
    • Crisscross the bandage under the front and back legs so it doesn't slip.

  • Bandaging a Leg wound


    • Clean the wound thoroughly 
    • Apply gauze
    • Bandage the whole leg securely
    • Place a wooden stick for support
    • Bandage over the stick

  • Treating Abdominal Injuries


    • Wash and disinfect your hands / Use gloves
    • Touch the wound as little as possible
    • Gently sprinkle clean lukewarm water over it
    • Push the parts of intestine back through the wound
    • Bandage the animal
      • Apple a pressure bandage (Make a thick pad)
      • Crisscross the bandage under the front and back legs
    •  Take the animal to the vet to stitch

  • Treating Broken Bones


    Animals with broken bones will be reluctant to allow you touch them, due to the severe pain. Once you have it under control, start your action plan;
    • Handle the broken bone as little as possible
    • If things go out wrong, better to give the animal a painkiller orally
    • Bandage the animal thoroughly
      • Bandage the broken bone with clean bandage.
      • Bring the bandaged foreleg near the neck.
      • Take a fresh bandage and tie one end to the leg. Then loop it around the neck.
      • Make another loop, the same way.
      • Make sure your doggy is comfortable with the sling.


    • Take your doggy to a vet. But if there is no vet, then let it heal its own. It takes about 10 to 14 days to heal.

  • Treating Broken Back

    Animal is unable to move its back legs and feels pain in the back. It fails to control or respond to its bodily functions.
    • Keep your dog warm.
    • Call a vet to home.
    • If results are unsatisfactory, better to euthanize your dog to ease its pain.  

How to Care for Your Dog

Dog is the best friend of man. That's a phrase you dog lovers agree with no doubt. When your day brings you all the nasty things you didn't expect, after you get home there's your doggy waiting to give you a warm pet-hug and to give a full licking therapy to your face. That's love and care.


But my question is, do you care for your dog? You maybe tired with your busy routine, but always make time to care for your pet. There maybe lots of friends to care for you, but your pet only has you.

Now, Let's see how you are gonna love and care for your pet.

  • Grooming

    • Bathing


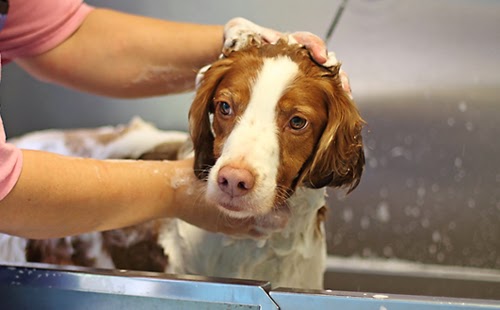
      Do not bathe your dog more than once a month. Because, too frequent bathing washes off their natural oils and may result skin disorders. Use a dog shampoo or soap. Rinse it properly and towel-dry in the sun light.

    • Brushing


      Dogs with long hair must be brushed everyday. And the dogs with a smooth coat, once in two days. First brush your dog in the opposite direction of the coat and then back to normal.

    • Ears


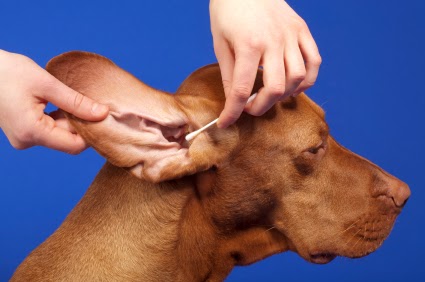
      Keep your dogs ears clean with the help of a bud. Only clean the area which is visible to your eyes. And never put the bud deep into the ear. Clean its ears wit a wet cotton. But don't clean it everyday. Once a week is just enough. Because, the wax in its ears serves a protective purpose.

      If your dog is with floppy ears, make sure to inspect its ears now and then. Because, due to lack of air going into the ears, fungal infections might take place.

    • Eyes


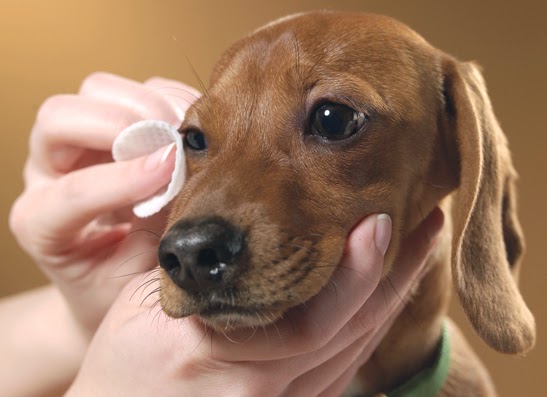
      Clean your doggy's eyes with a wet cotton, only if you see a discharge which is not normal. Avoid cleaning its eyes every single day.

    • Paws


      Always keep an eagle eye on the paws of your doggy for cracks and rubbish etc.

    • Nails

      Don't ever touch your dog's nails. Get your dog's nails trimmed by a vet. To make your dog's nails short naturally, tae it for regular walks. In fact, a dog that is exercised frequently does not need ts nails cut, as the act of walking itself trims the nails down.

  • Housing
    • In summer


      Make sure it is with adequate ventilation. Direct sunlight should be avoided. Always give your dog fresh water. Dogs sweat from their mouths so, don't tie their mouth for any reason.

    • In winter


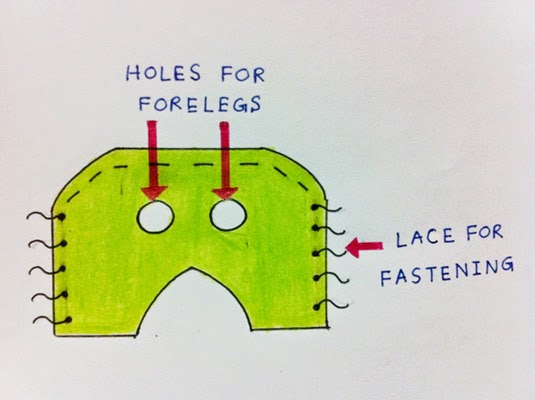
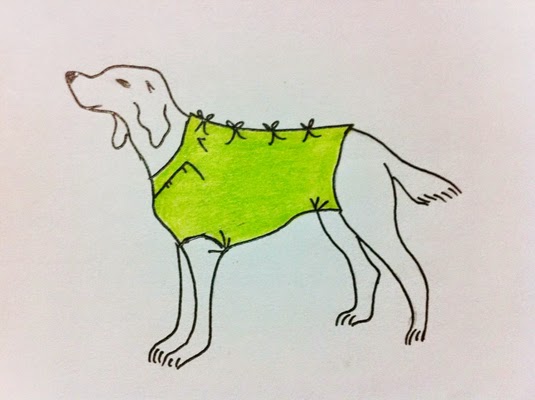
      Provide him with a warm bed. You can even make a winter coat to your doggy from an old blanket. But make sure it is always dry. (See the illustration below)


  • Exercise


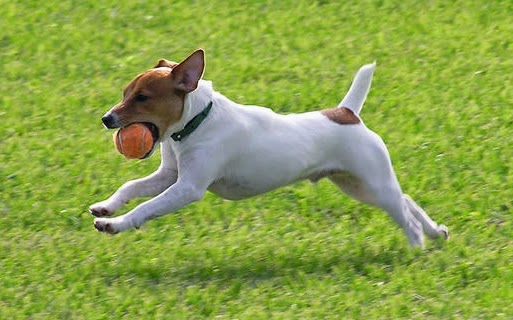
    Your pet should get regular exercise. Morning and evening walks are a must. Don't keep your dog tied, as this leads to boredom and frustration. Dogs kept tied up always bite. 

  • Feeding

    • Puppies for 1-4 monthsFeed time :
      • 7:00 am - Whole milk, one crisp toast
      • 11:00 am - one cup of lukewarm milk or porridge 
      • 2:00 pm - Grated carrot (Vitamin A), chopped onions (Minerals), Spinach (Iron) and rice all boiled together.
      • 6:00 pm - Farex with milk
      • 10:00 pm - one cup milk with Farex  

    • Orphaned Puppies up to 4 weeks
      They must be fed on a milk substitute, every 2 hours for the first two weeks. Then, every three hours, with an eye dropper or a feeding bottle. Between 5 and 8 weeks, start with semi-solid foods 3 times daily.

  • Vaccinating 

    • 30 days - Deworming
    • 45 days - 6-in-1 ( distemper, parvo virus, hepatitis, leptosporasis, para-influenza)
    • 2½ months - Booster
    • 3 months - Anti-Rabies

      Note: Each of these vaccines requires an annual booster

About Us

Yes.And.How. is an approach to create a world where anyone can easily learn how to do anything. It's your one-stop online blog resource for day to day life challenges. Yes.And.How. will empower you to learn exactly, how to do anything—and it’s available to you anytime, anywhere.

Like Us

© Yes. And. How. All rights reserved | Theme Designed by Seo Blogger Templates